You might be working on a project where you need to filter sets of data and create a raw data of that filtered sets of data to a new sheet or range.
By default, Excel copies hidden or filtered cells in addition to visible cells. If some cells, rows, or columns on your worksheet are not displayed, you have the option of copying all cells or only the visible cells.
The following snippet allows you to automate the process in microseconds.
[VBA]
Public Function GetFilteredData()
    Dim rawWs As Worksheet            'RAW DATA WORKSHEET
    Dim tarWs As Worksheet            'TARGET WORKSHEET

    'Replace this with your actual Worksheets
    Set rawWs = Sheets("Raw Data")
    Set tarWs = Sheets("Filtered Data Visualizations")

    Application.ScreenUpdating = False

    'Clear old contents of the Target Worksheet
    tarWs.Range("A2:N" & Rows.Count).ClearContents

    '****************************************************
    ' Select Raw Data Sheet and
    ' Copy only the visible rows if filter is applied
    '
    rawWs.Select
    Range("A2", Cells(ActiveSheet.UsedRange.Rows.Count, Range("N2").Column)).SpecialCells(xlCellTypeVisible).Copy

    '****************************************************
    'Select the Target worksheet and
    'Paste the copied data
    '
    tarWs.Select
    Range("A2").Select
    ActiveSheet.Paste
    Application.CutCopyMode = False

    Range("A2").Select
    Application.ScreenUpdating = True
End Function
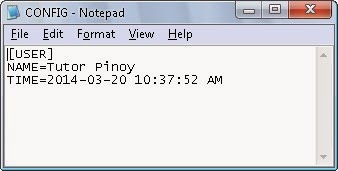
In this example shows only a simple form that saves and retrieves value from the CONFIG.INI file.
After reading this, you can use your own creativity on how you're going to implement this on your project.
To start with, On your Form add the following controls and arrange them according to the image above. (1)TextBox - Change the Name property to "txtSetting" (2)Command Button - Change the Caption and Name Properties to the following: Save: Change the Name property to "cmdSave" Retrieve: Change the Name property to "cmdRetrieve" (5)Label - For the two labels we'll be using to retrieve the values. Remove the default caption and change the Name Properties to lblName and lblTime. Now, Copy the Form Codes below and Paste on the Form1 code window of your VB6 Project. Form Codes:
Option Explicit
Dim ConfigFile As String
Private Sub cmdRetrieve_Click() 'Set the Configuration File Name ConfigFile = App.Path & "\CONFIG.INI"
Private Sub cmdSave_Click() 'Set the Configuration File Name ConfigFile = App.Path & "\CONFIG.INI"
'Check for empty values If txtSetting.Text = "" Then MsgBox "Please type your name on the textbox provided.", vbCritical, "Settings" txtSetting.SetFocus Exit Sub End If
'Put the name and the time into the config file PutINISetting "USER", "NAME", txtSetting.Text, ConfigFile PutINISetting "USER", "TIME", Format(Now, "yyyy-mm-dd hh:mm:ss AMPM"), ConfigFile
MsgBox "Settings have been saved.", vbInformation, "Settings"
End Sub
You can save copy and paste the following code in a standard module and save it as settings.bas or give it a name of your own. The WritePrivateProfileSetting API Function creates the Configuration file name if it doesn't exists.
Module (settings.bas)
Option Explicit

'API Function to read information from INI File
Public Declare Function GetPrivateProfileString Lib "kernel32" _
    Alias "GetPrivateProfileStringA" (ByVal lpApplicationName As String, _
    ByVal lpKeyName As Any, _
    ByVal lpDefault As String, _
    ByVal lpReturnedString As String, _
    ByVal nSize As Long, _
    ByVal lpFileName As String) As Long

'API Function to write information to the INI File
Private Declare Function WritePrivateProfileString Lib "kernel32" _
    Alias "WritePrivateProfileStringA" (ByVal lpApplicationName As String, _
    ByVal lpKeyName As Any, _
    ByVal lpString As Any, _
    ByVal lpFileName As String) As Long

'Get the INI Setting from the File
Public Function GetINISetting(ByVal sHeading As String, _
    ByVal sKey As String, _
    sINIFileName) As String

    Const cparmLen = 50
    Dim sReturn As String * cparmLen
    Dim sDefault As String * cparmLen
    Dim lLength As Long
    lLength = GetPrivateProfileString(sHeading, _
            sKey, _
            sDefault, _
            sReturn, _
            cparmLen, _
            sINIFileName)

    GetINISetting = Mid(sReturn, 1, lLength)
End Function

'Save INI Setting in the File
Public Function PutINISetting(ByVal sHeading As String, _
    ByVal sKey As String, _
    ByVal sSetting As String, _
    sINIFileName) As Boolean

    Const cparmLen = 50
    Dim sReturn As String * cparmLen
    Dim sDefault As String * cparmLen
    Dim aLength As Long
    aLength = WritePrivateProfileString(sHeading, _
        sKey, _
        sSetting, _
        sINIFileName)

    PutINISetting = True
End Function
This will be how the configuration file looks like if we open it with a text editor.
In this tutorial, I'll be showing you a basic example on how to create Pagination on your website. I'm not really a Pro Coder so please bare with my coding. The purpose of this is just to give basic logic of how it was created. So, let's get it started.
First, we will create the PHP file to print out the page ranges. We have two parameters $LIMIT and $RANGE that is passed by an Ajax request via jQuery.
$LIMIT - This is the limit of rows per page to be displayed. $RANGE - Initially, this is set to 1. This is the pages range that will be displayed. It will decrement/increment as you click the Next or Previous buttons.
Additional parameters...
$MAX - The maximum number of pages to be shown in a range. This example shows 10. $RECORDS - Get the total number of records in the database table. $PAGES - This is the quotient of the $RECORDS divided by the $LIMIT.
Then we do some conditional statement to print out the pages, next and prev button. PHP File (pages.php)
<?php include "js/pagination.js"; require_once("includes/functions.php");
# Declare variable of the class $PI = new PartsInventory;
# Get parameter values passed by the jQuery-Ajax script $_GET['limit'] == "" ? $LIMIT = 10 : $LIMIT = $_GET['limit']; $RANGE = $_GET['page'];
# Get the Total Number of Records $RECORDS = $PI->InventoryCount();
# Calculate the number of pages $PAGES = number_format($RECORDS / $LIMIT);
# This will be the range of pages to be displayed # e.g. 1 2 3 4 5 6 7 8 9 10 ... 20 > $MAX = 10;
I'll be showing you an example on how to Scrape Data from a Website into Excel Worksheet using VBA. We'll be scraping data from www(dot)renewableuk(dot)com. Please also read the privacy policy of the website before mining data.
Goal: Get all data under all column headings which can be found on this website i.e. Wind Project, Region, ..., Type of Project
Requirements:
You need to add a reference, Microsoft HTML Object Library on your VBA project.
Usage:
You can call the ProcessWeb() sub directly by pressing F5 on the Microsoft Visual Basic Window.
Or you can add a button on your excel worksheet then assign ProcessWeb() as the macro.
VBA CODE:
Function ScrapeWebPage(ByVal URL As String) Dim HTMLDoc As New HTMLDocument Dim tmpDoc As New HTMLDocument
Dim WS As Worksheet
Dim i As Integer, row As Integer Dim File As Integer Dim Filename As String Dim DataLine As String File = FreeFile
Filename = ActiveWorkbook.Path & "\html.log"
Set WS = Sheets("DATA")
'create new XMLHTTP Object Set XMLHttpRequest = CreateObject("MSXML2.XMLHTTP") XMLHttpRequest.Open "GET", URL, False XMLHttpRequest.send
While XMLHttpRequest.readyState <> 4 DoEvents Wend
With HTMLDoc.body 'Set HTML Document .innerHTML = XMLHttpRequest.responseText
'Get only Order List Tag of HTML Document Set orderedlists = .getElementsByTagName("ol")
'Reset the Document to the HTML of the second ordered list element 'where we only need to extract the data .innerHTML = orderedlists(1).innerHTML
'Now, we'll get the list items Set ListItems = .getElementsByTagName("li")
'Open our log file for output stream Open Filename For Output As #File For Each li In ListItems
With tmpDoc.body 'Set the temp doc .innerHTML = li.innerHTML
'There are about 10 columns, so there are 10 p's Set ps = .getElementsByTagName("p")
For Each p In ps 'Print only the text, excluding the tags Print #File, p.innerText Next
End With Next 'close the file Close #File
End With
'Open the file again, we'll use it to retrieve each data lines Open Filename For Input As #File
'Last row of the worksheet row = lastRow + 1
While Not EOF(File) For i = 1 To 10 'read the data from the log file Line Input #File, DataLine
'Put the data on the 1st to 10th column WS.Cells(row, i).Value = DataLine
Next i row = row + 1 Wend Close #File
End Function
'Get the total number pages we need to scrape Function totalPage() As Integer Dim HTMLDoc As New HTMLDocument Dim tmpDoc As New HTMLDocument Dim html As String Dim mask As String Dim URL As String
If you're working on a project or having a numerous reports in excel to be sent out to your boss or clients. And what you usually do is save the workbook, compose a new email, copy the contents or attach it on your email client. That's a time consuming task!
What we wanted to do is automate the tasks from within the Excel Workbook you're working with. The SendEmail() Function below will do the task for you.
Function Definition:
Function SendEmail(ByVal Username As String, _
                   ByVal Password As String, _
                   ByVal ToAddress As String, _
                   ByVal Subject As String, _
                   ByVal HTMLMessage As String, _
                   ByVal SMTPServer As String, _
                   Optional Attachment As Variant = Empty) As Boolean
Paramaters:
Username - is the email address of the sender.
Password - is the password of the sender.
ToAddress - is the recipient of email to which the email be sent. Multiple email addresses can be separated with semi-colons.
Subject - is the subject of the email.
HTMLMessage - may contain both plain text and html message.
SMTPServer - is the name of the outgoing email server. If you're connected within a company's intranet you can use your company's outgoing email server. In this tutorial we'll be using gmail's smtp server.
Attachment - is the file name that will be attached to the message. If you're going to send the workbook that you're working with as an attachment, you can just put ThisWorkbook.FullName.
Requirement: This function requires you to add a reference to Microsoft CDO for Windows 2000. At Microsoft Visual Basic Interface go to Tools>References...
CONFIG SETUP: You may also create another sheet for the configuration setup and assign names to ranges or fields.
USAGE: You can call the function via a click of a button or when a target is changed on a worksheet.
Sub Send()
    Dim Ws As Worksheet
    Dim Attachment As String

    Set Ws = ActiveSheet

    With Ws

        If Trim(.Range("ATTACHMENT")) = "" Then
            ThisWorkbook.Save
            ThisWorkbook.ChangeFileAccess xlReadOnly
            Attachment = ThisWorkbook.FullName
            ThisWorkbook.ChangeFileAccess xlReadWrite
        Else
            Attachment = .Range("ATTACHMENT")
        End If

        'CHECK WHETHER THE FUNCTION RETURNS TRUE OR FALSE
        If SendEmail(.Range("SENDER"), .Range("PASS"), .Range("RECIPIENT"), _
                  .Range("SUBJECT"), .Range("MESSAGE"), .Range("SMTP"), Attachment) = True Then
            MsgBox "Email was successfully sent to " & .Range("RECIPIENT") & ".", vbInformation, "Sending Successful"
        Else
            MsgBox "A problem has occurred while trying to send email.", vbCritical, "Sending Failed"
        End If

    End With

End Sub
FULL VBA CODE:
Function SendEmail(ByVal Username As String, _ ByVal Password As String, _ ByVal ToAddress As String, _ ByVal Subject As String, _ ByVal HTMLMessage As String, _ ByVal SMTPServer As String, _ Optional Attachment As Variant = Empty) As Boolean
Dim Mail As New Message Dim Cfg As Configuration
'CHECK FOR EMPTY AND INVALID PARAMETER VALUES If Trim(Username) = "" Or _ InStr(1, Trim(Username), "@") = 0 Then SendEmail = False Exit Function End If
If Trim(Password) = "" Then SendEmail = False Exit Function End If
If Trim(Subject) = "" Then SendEmail = False Exit Function End If
If Trim(SMTPServer) = "" Then SendEmail = False Exit Function End If
This Ultimate Excel Calendar Template allows user, company or any organization to create their own calendars. The template was created in VBA and may require the user to enable macro content in the document.
Annual Calendar Template:
Country - Choose your home country.
Year - Calendar year
First Day of the Week - The first day of the week to be displayed
First Week of The Year - Determines the work week number
The screenshot below shows the calendar of the whole year and the holidays.
The video shows how does Ultimate Excel Calendar template work.
Monthly Calendar Template:
Month - Choose which Month you want to display.
Year - Month year.
First Day of Week - First day of the week to be displayed.
Country - Choose your location
This template will display the Holiday of the Month in the respective dates.